 6. DELL服务器配置RAID 中

I. Requirement Description
The server has two 480GB SSD drives at the front and four 4TB HDDs at the back. The first two SSDs will be configured as RAID 1 for the operating system, while the four mechanical drives will be set up as RAID 5 for data storage.
II. Creating RAID 1 and RAID 5
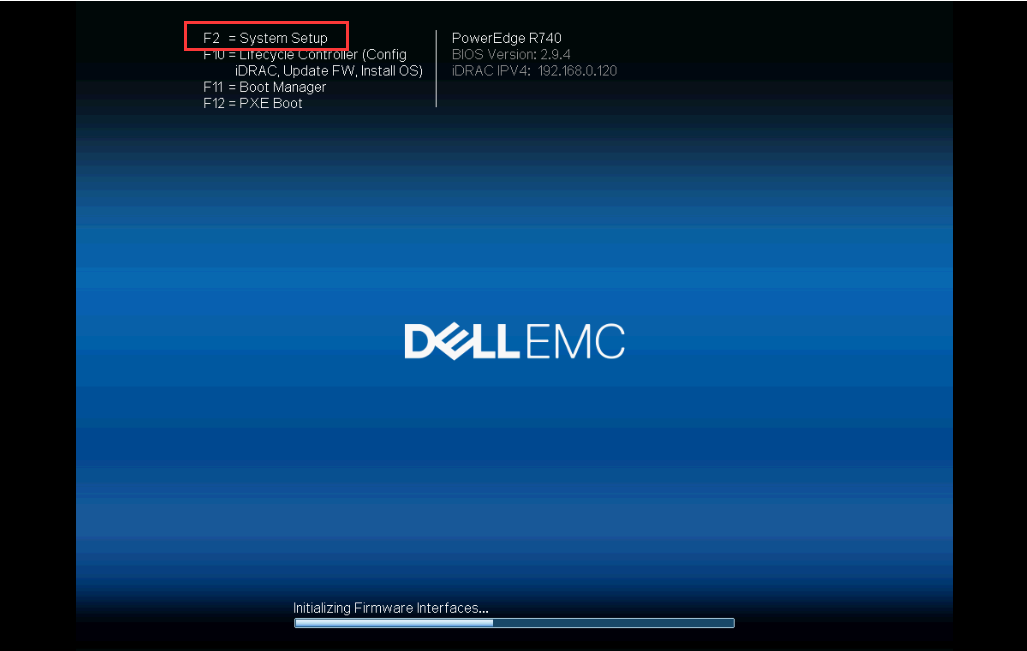
2.1. After the server boots up, press F2 at the following screen to enter System Setup.
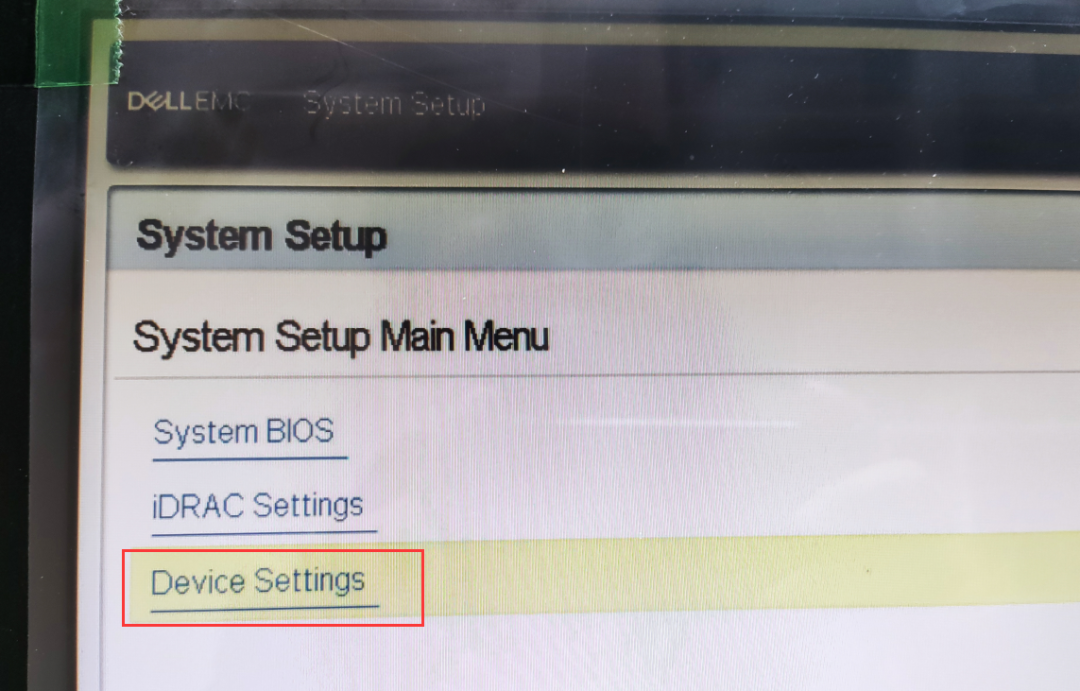
2.2. Inside System Setup, locate Device Settings.
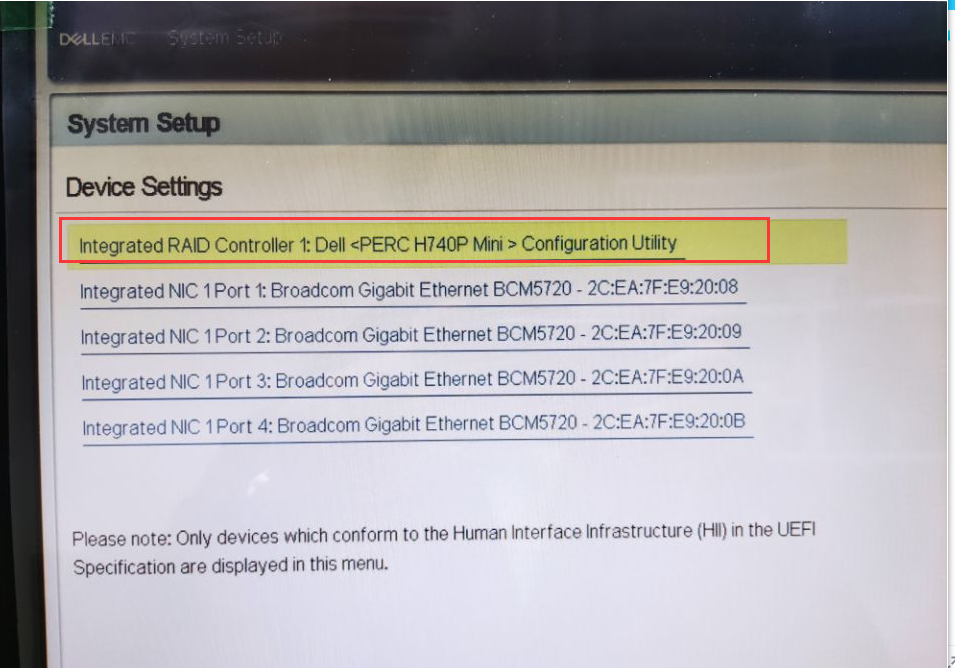
2.3. Find Integrated RAID Controller1\:Dell\Configuration Utility. Select it and click to enter.
Note: The image above shows the server’s RAID controller card.
What does the H740P Mini RAID controller actually look like? See below:
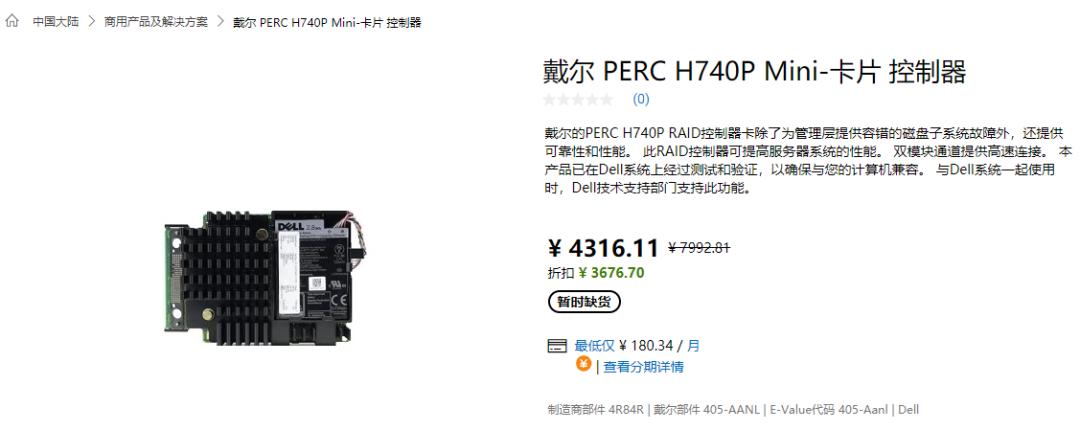
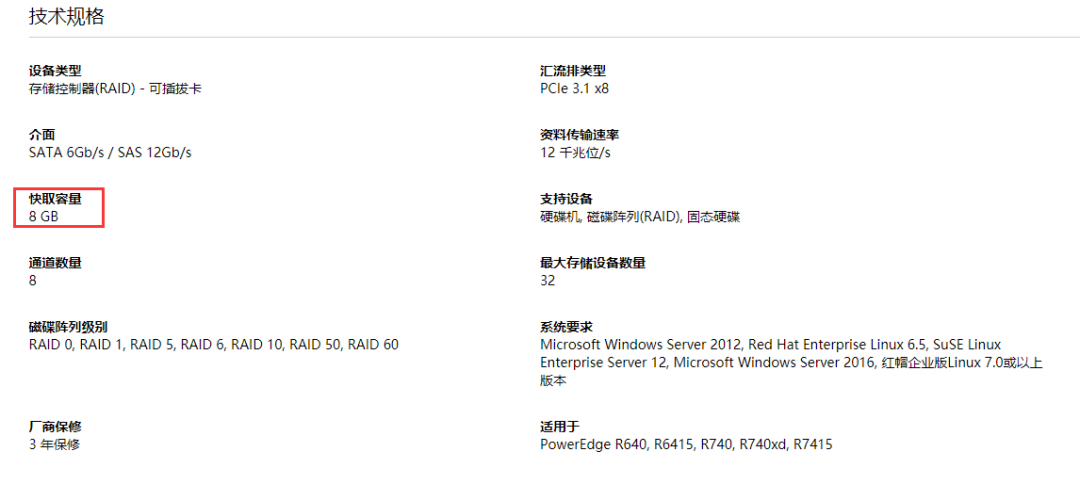
The H740P Mini RAID controller primarily features an 8GB fast cache. This cache allows the RAID card to act as a buffer for read/write operations between server drives.
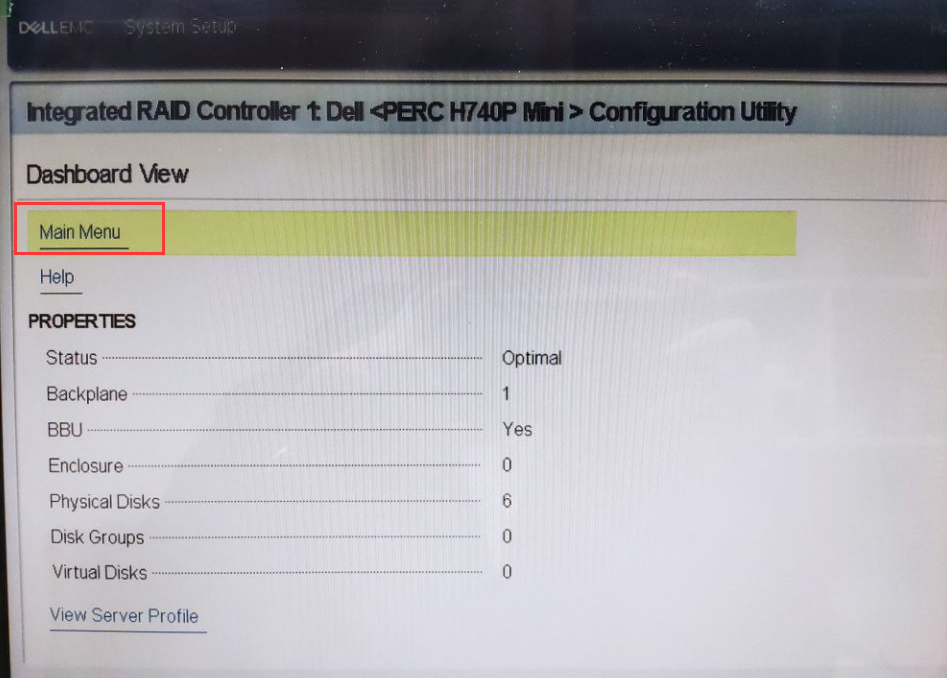
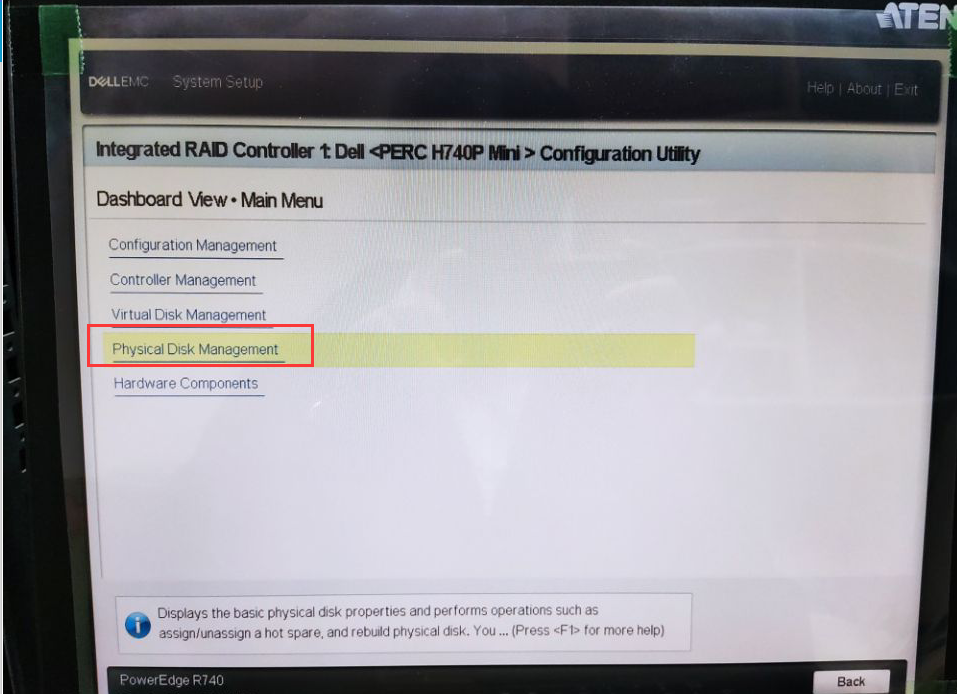
2.4. Then select Main Menu.
2.5. First, check if all drives are online and functioning properly. Select Physical Disk Management.
2.6. You can see that the two 480GB SSDs are in Ready status, and the four 4TB HDDs are also Ready. Return to the previous level.

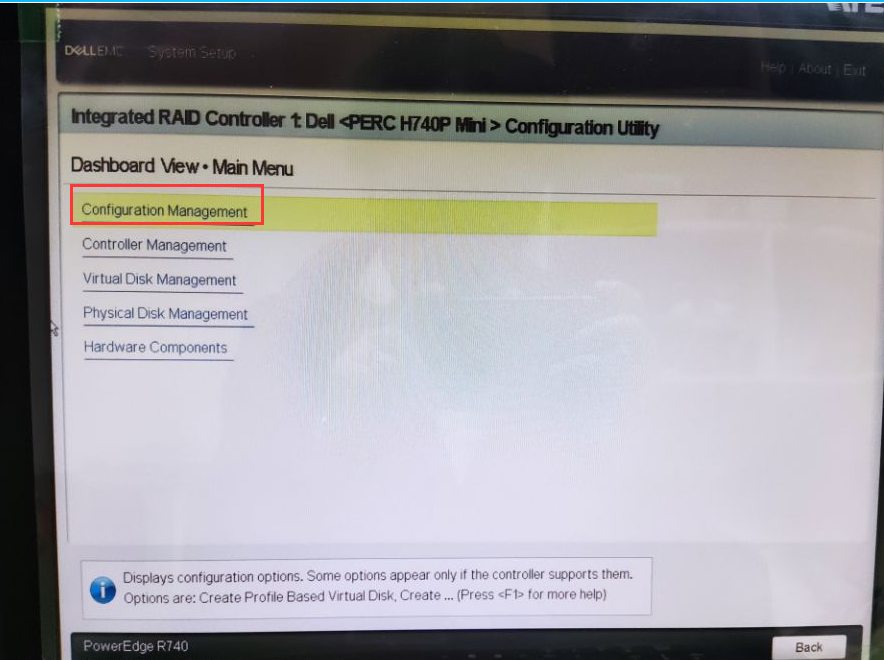
2.7. Select Configuration Management.
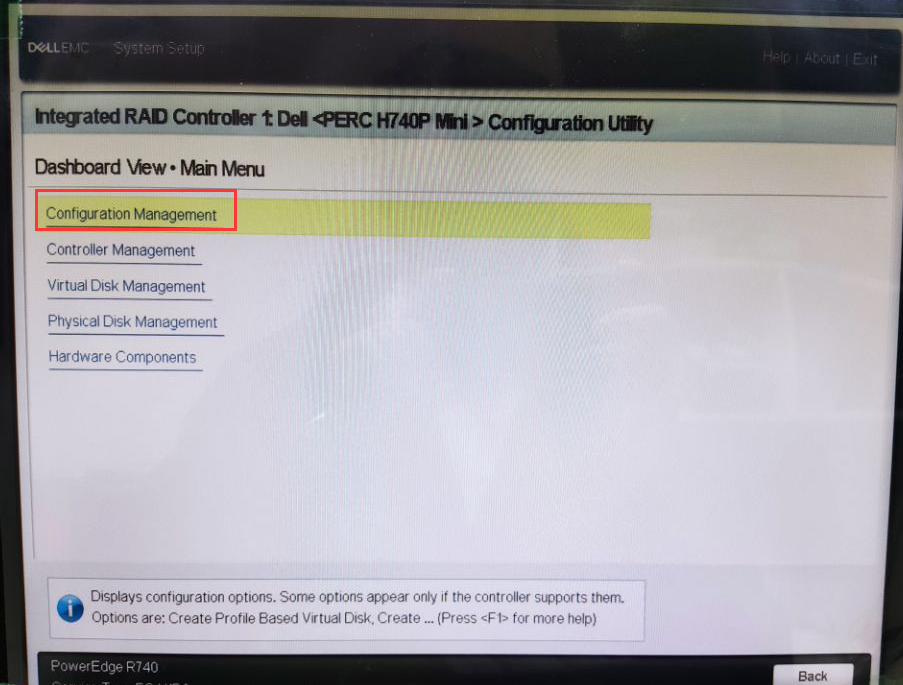
2.8. Select Create Virtual Disk.

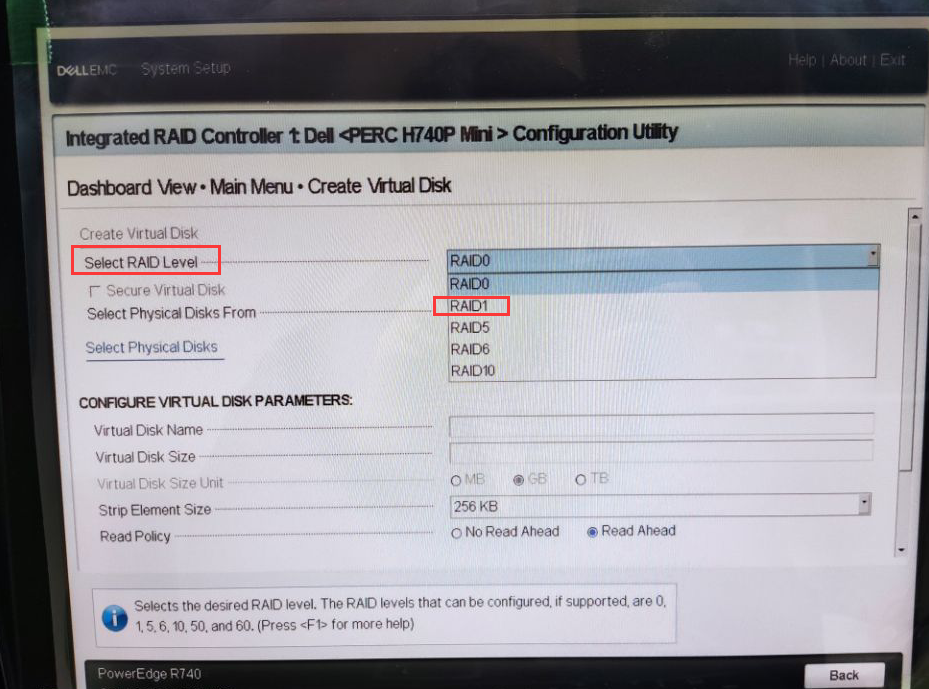
2.9. Under Select RAID Level, choose RAID 1.
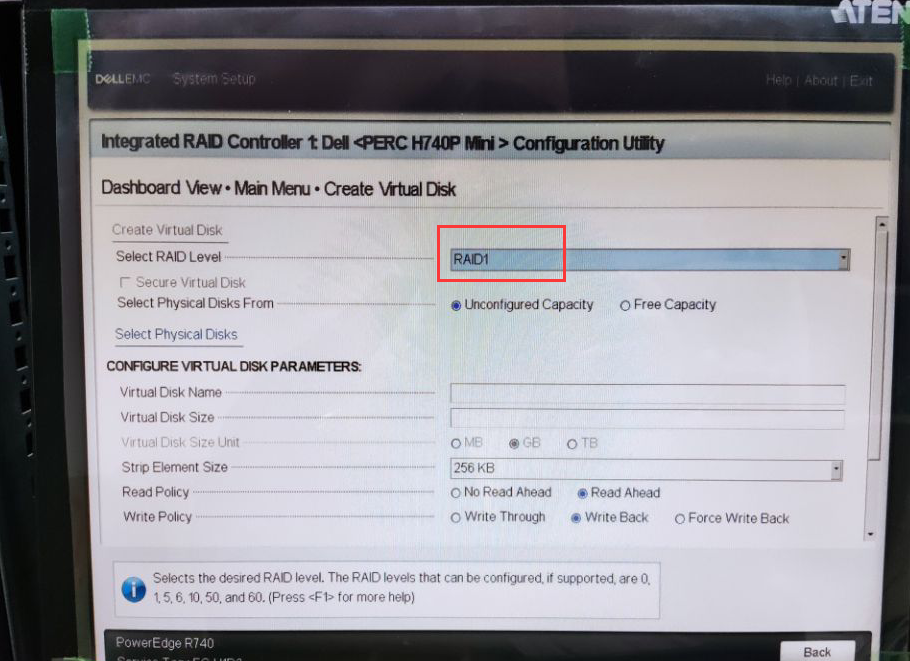
2.10. RAID level is now set to RAID 1.
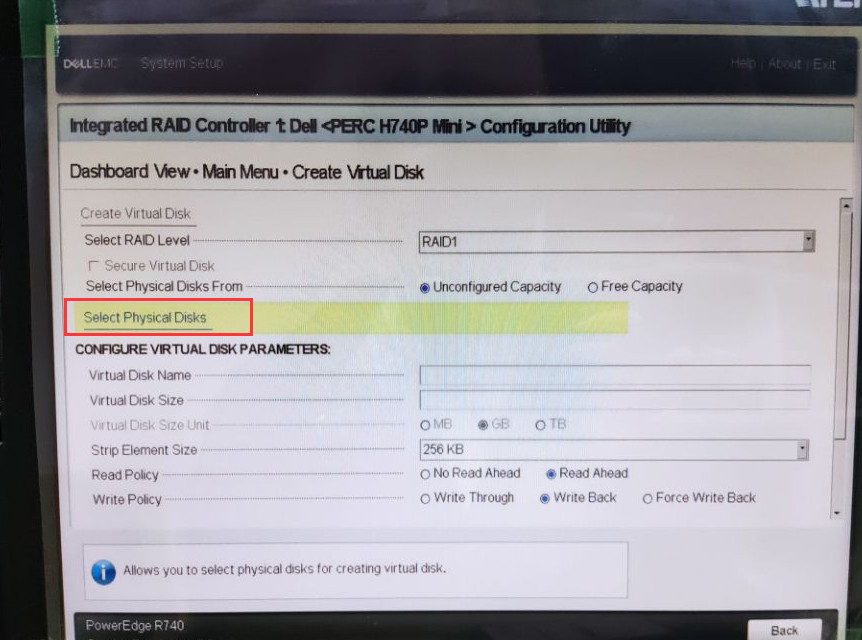
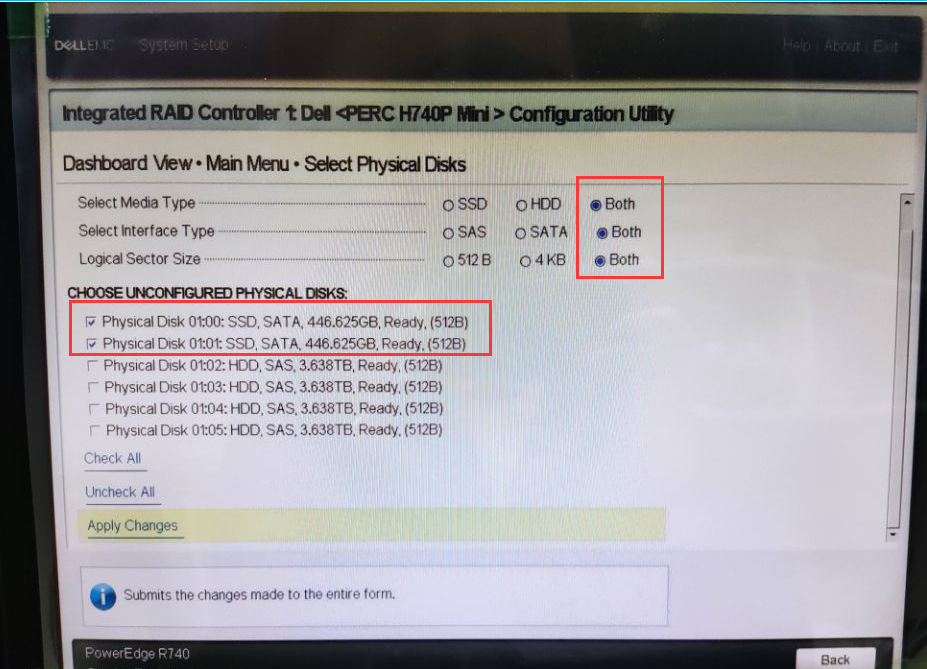
2.11. Next, select the first two SSD drives. Click Select Physical Disks.
2.12. Choose the two 480GB SSDs. Use the up/down arrow keys to highlight a drive and press the spacebar to check the box in front of it. After selecting both drives, click Apply Changes.
2.13. Click OK.
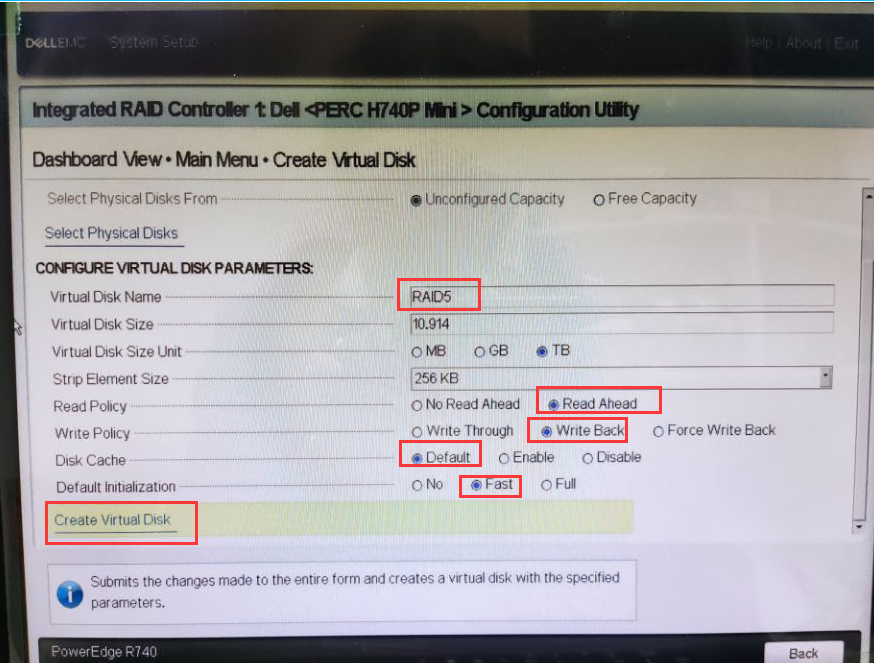
2.14. Configure RAID 1 parameters.
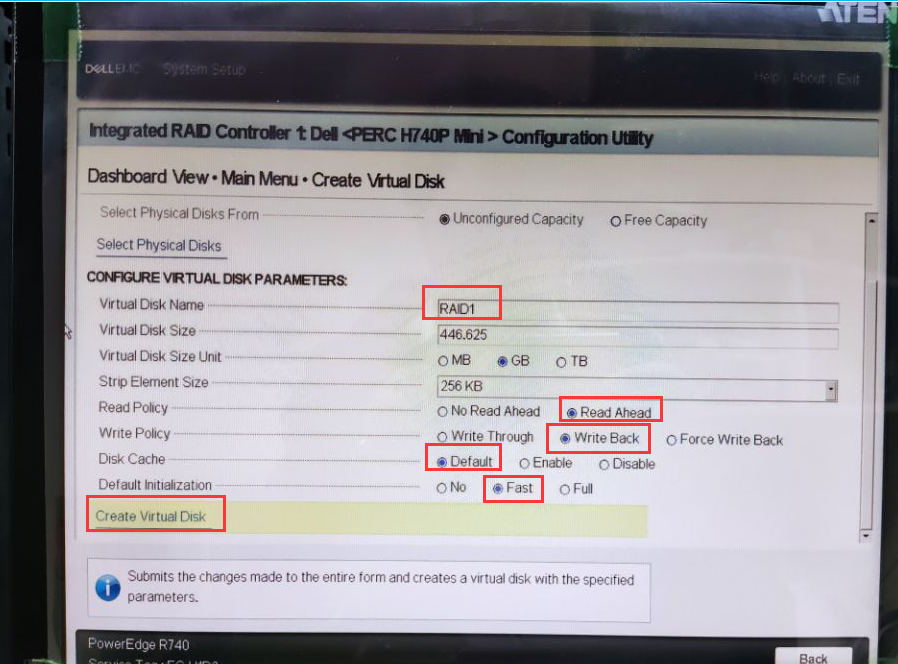
Virtual Disk Name: Name the RAID 1 virtual disk as needed.
Virtual Disk Size: Space size, select the default full capacity.
Virtual Disk Size Unit: Choose the unit for disk size.
Strip Element Size:
Stripe size, select the default 256KB. How to set the stripe size? For database server applications, typically choose 4-16KB. For large files, CAD, or rendering large images, it’s recommended to set it to 128KB or higher. For web servers or print servers, 16-64KB is sufficient.
Read Policy:
Choose Read Ahead mode: Pre-read mode. The advantage of this mode is that when a user reads data, the drive loads the data into the RAID card’s 8GB cache for delivery, rather than the user reading directly from the drive.
If you choose No Read Ahead mode: The user reads data directly from the drive, which is slower compared to Read Ahead.
Write Policy:
Choose Write Back mode: Write-back mode. When a user writes data to the drive, it is not written directly to the drive. Instead, the data is first written to the RAID card’s 8GB cache, and then the cache writes the data to the drive. This method is faster.
Write Through mode: The user writes data directly to the drive without using the RAID card’s cache. This mode is slower than Write Back.
Force Write Back mode: What does forced write-back mean? This relates to the RAID card’s battery. RAID cards are powered by batteries, which typically last about three years. Regardless of whether the RAID card has power, data is first written to the RAID card’s cache before being transferred to the drive. However, if the RAID battery dies after three years and data is being written to the server at that moment, the data in the cache could be lost in the event of a sudden power outage. It is not recommended to choose Force Write Back.
If Write Back mode is selected and the RAID card battery dies, the policy will automatically switch to Write Through mode.
Disk Cache: Select Default.
Default Initialization: Initialization, choose Fast for quick drive initialization. This allows you to install the operating system on RAID 1 immediately after creation without waiting. If you choose Full, you must wait for RAID 1 to complete initialization before installing the operating system. To check the initialization progress of RAID 1, refer to the end of this article.
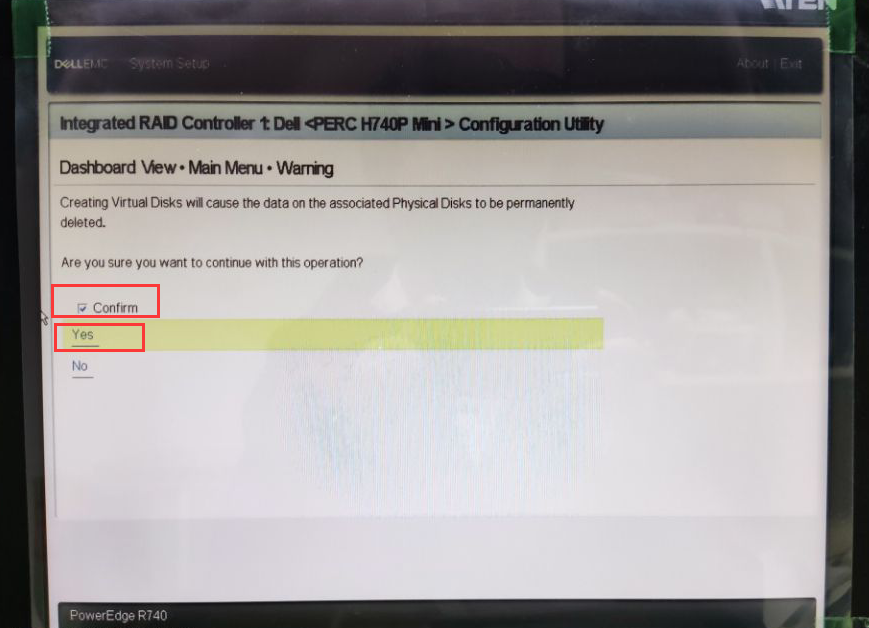
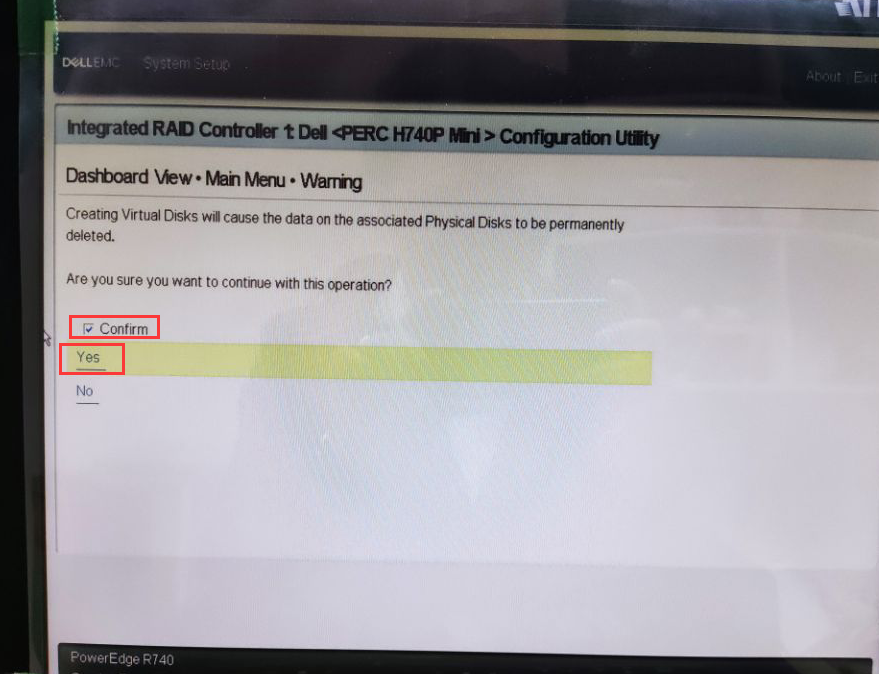
2.15. Check Confirm, then click Yes.
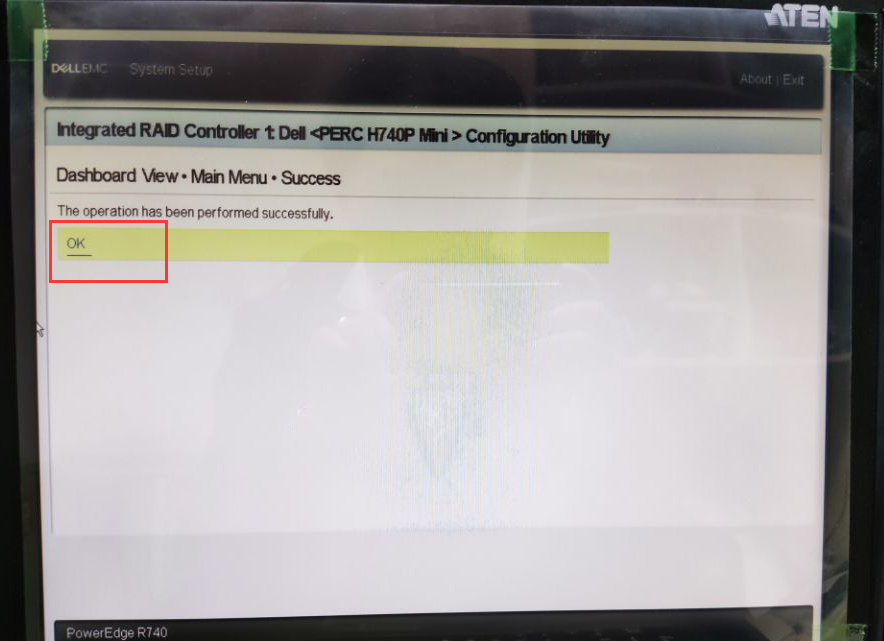
2.16. Click OK.
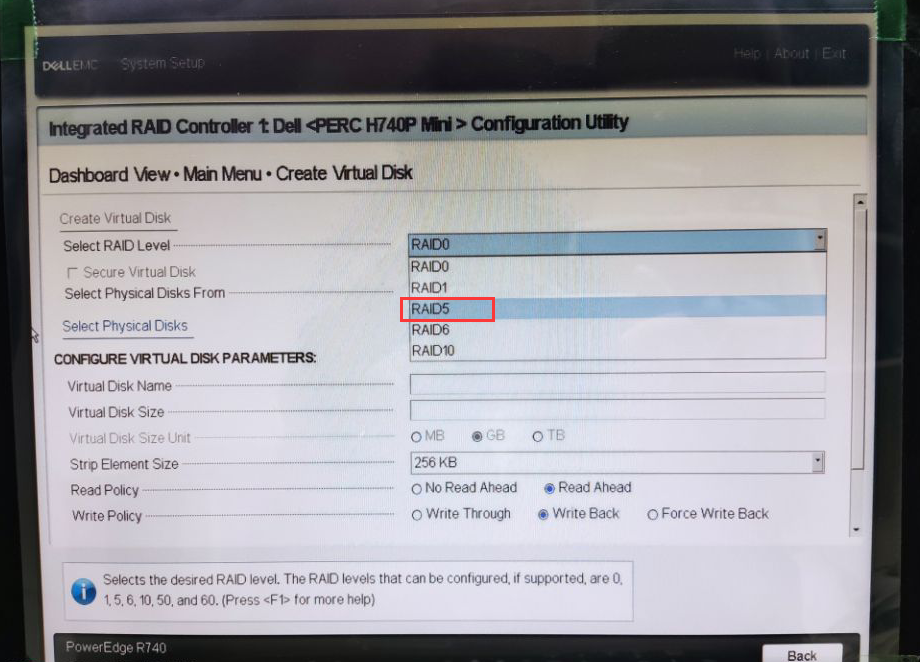
2.17. After clicking OK, you will return to the previous screen. Continue creating RAID 5.
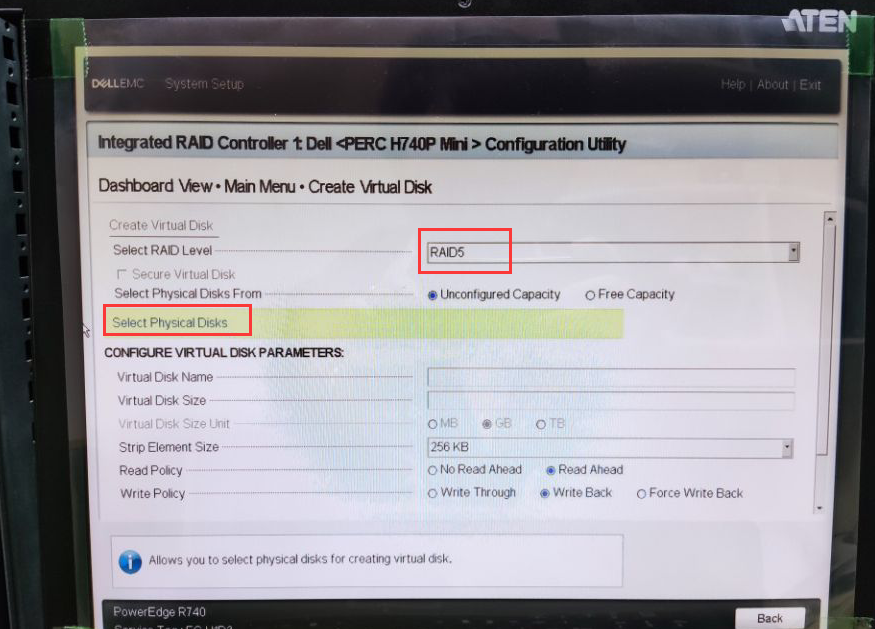
Under Select RAID Level, choose RAID 5.
2.18. After selecting RAID 5, choose Select Physical Disks.
2.19. Select the remaining four 4TB HDDs. Then click Apply Changes.
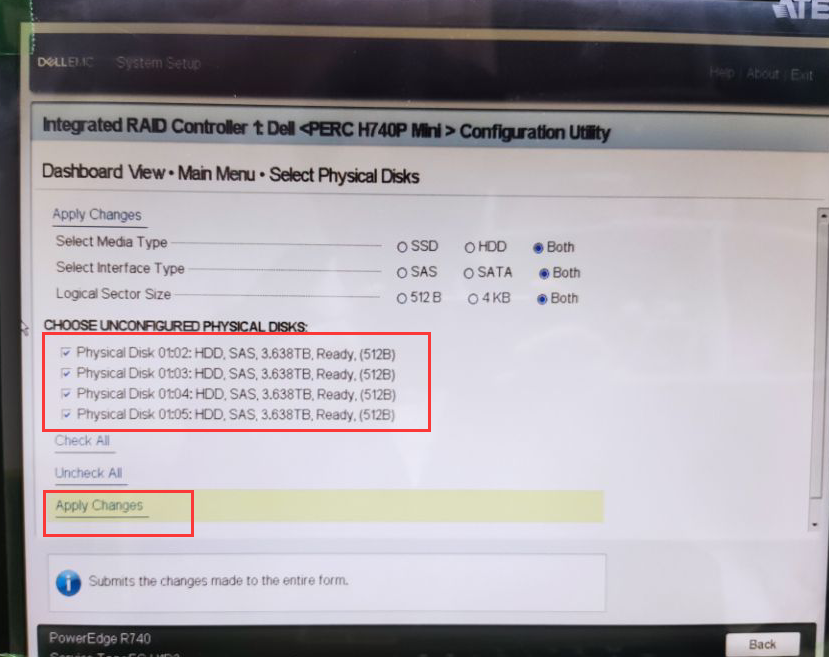
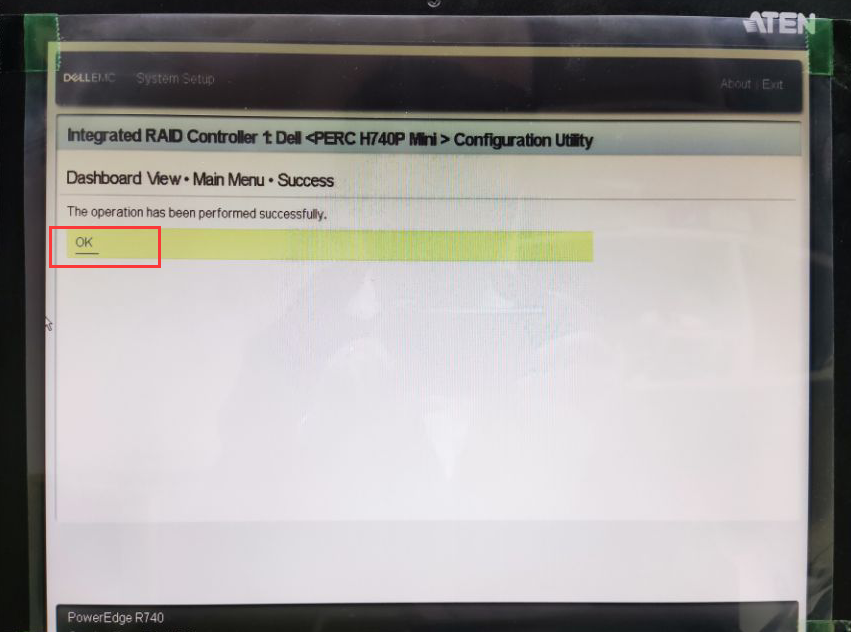
2.20. Click OK.

2.21. The parameters for RAID 5 are the same as for RAID 1. Then select Create Virtual Disk.
2.22. Check Confirm, then click Yes.
2.23. Click OK.
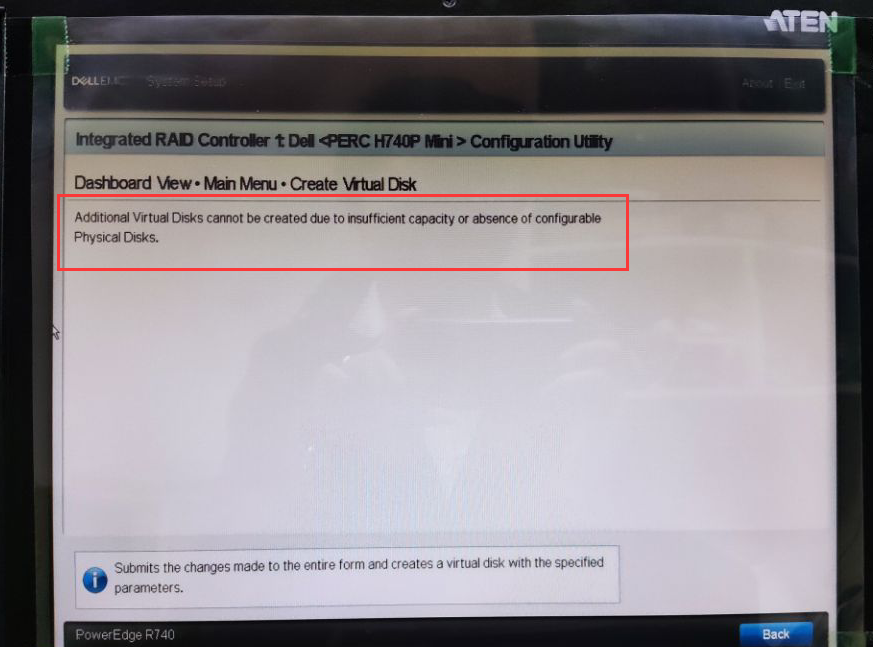
2.24. The drives have been created. Click Back. At this point, RAID 1 and RAID 5 have been successfully created.
III. Verification and Inspection
3.1. Check RAID Creation
Return to the Main Menu and find Configuration Management.
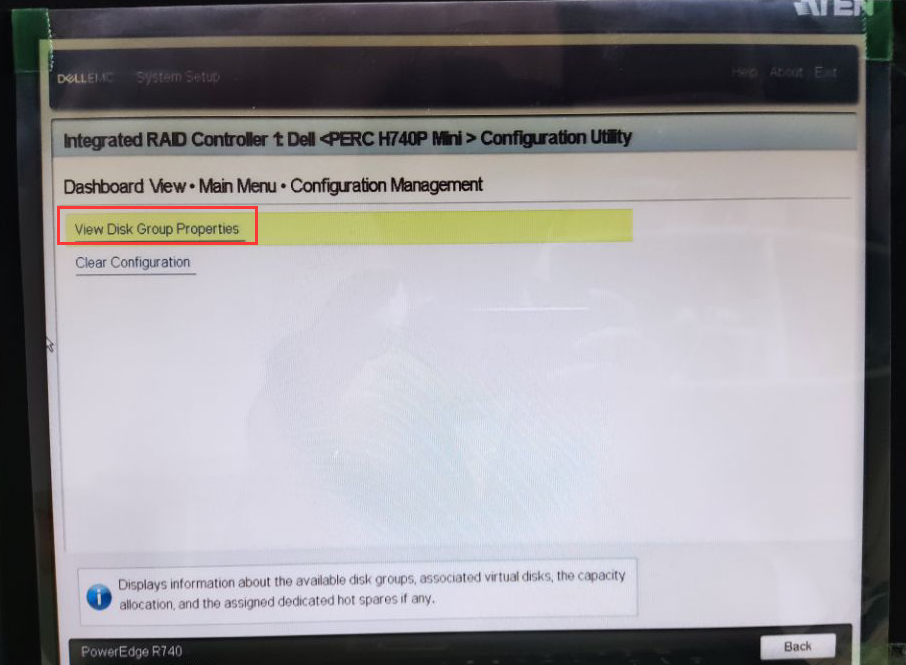
Select View Disk Group Properties.
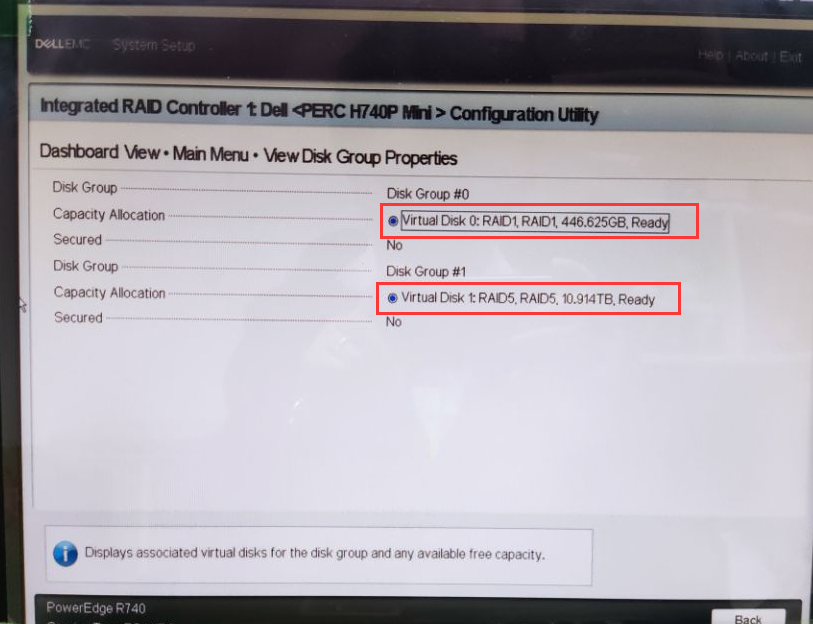
Now, you can see two Disk Groups: one for RAID 1 and another for RAID 5. Both RAIDs have been created.
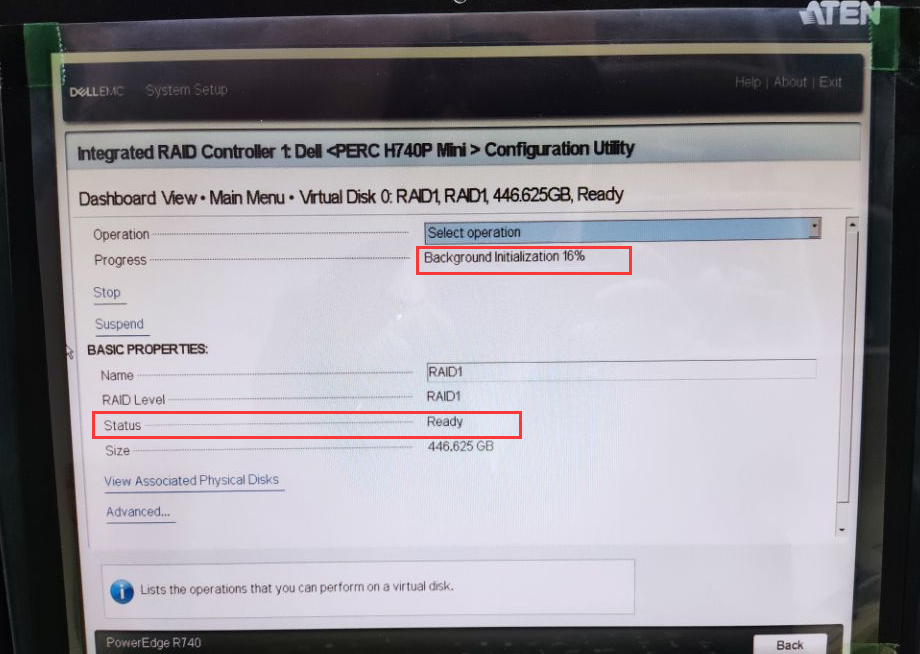
3.2. Check RAID Initialization Progress
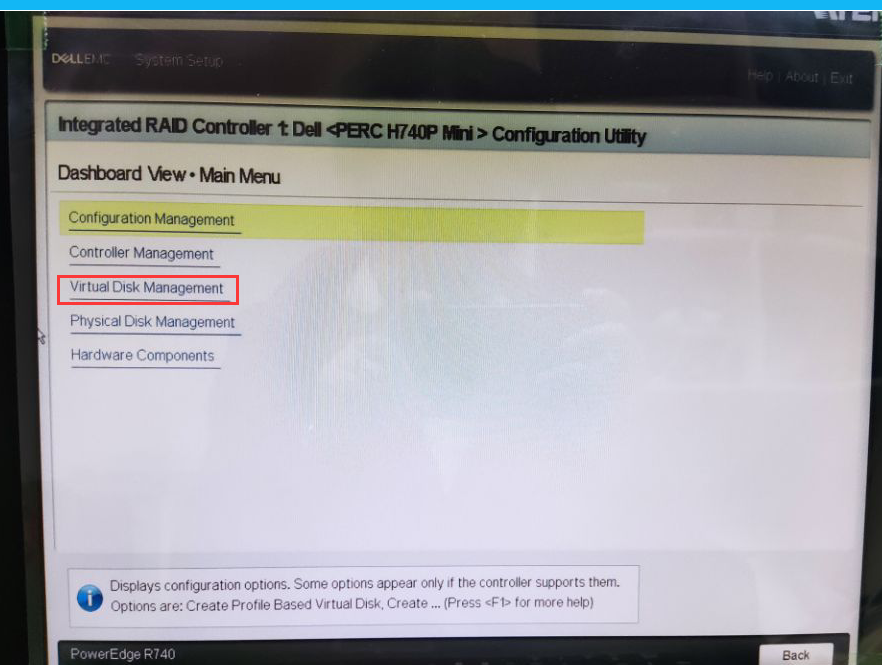
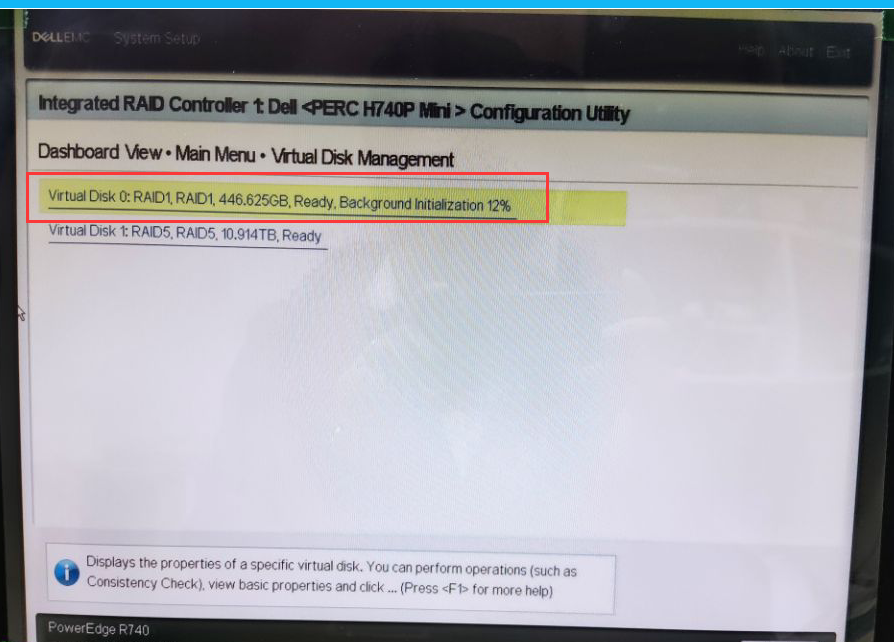
Return to the Main Menu and find Virtual Disk Management.
Here, you can see that RAID 1 is initializing, currently at 12%.
Initialization at 16%. If you selected Full initialization for the RAID drives during parameter configuration, you must wait for RAID 1 to reach 100% initialization before installing the operating system.